Posted on Leave a comment

JP Hydrofoil Boards

JP Hydrofoil Boards

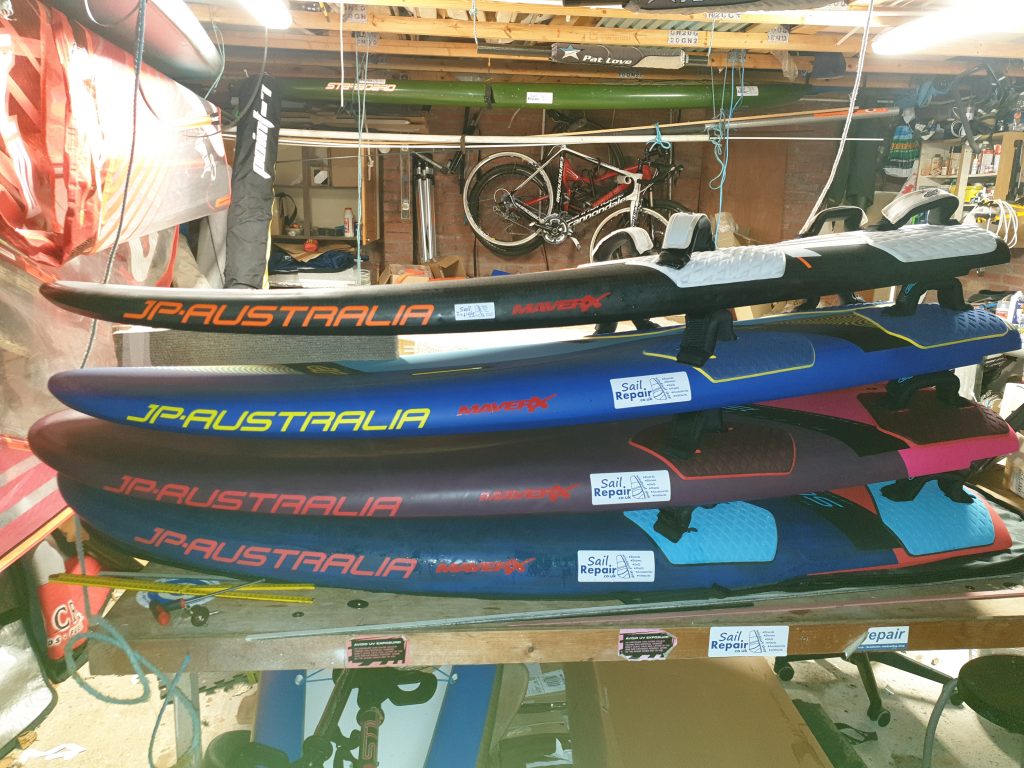
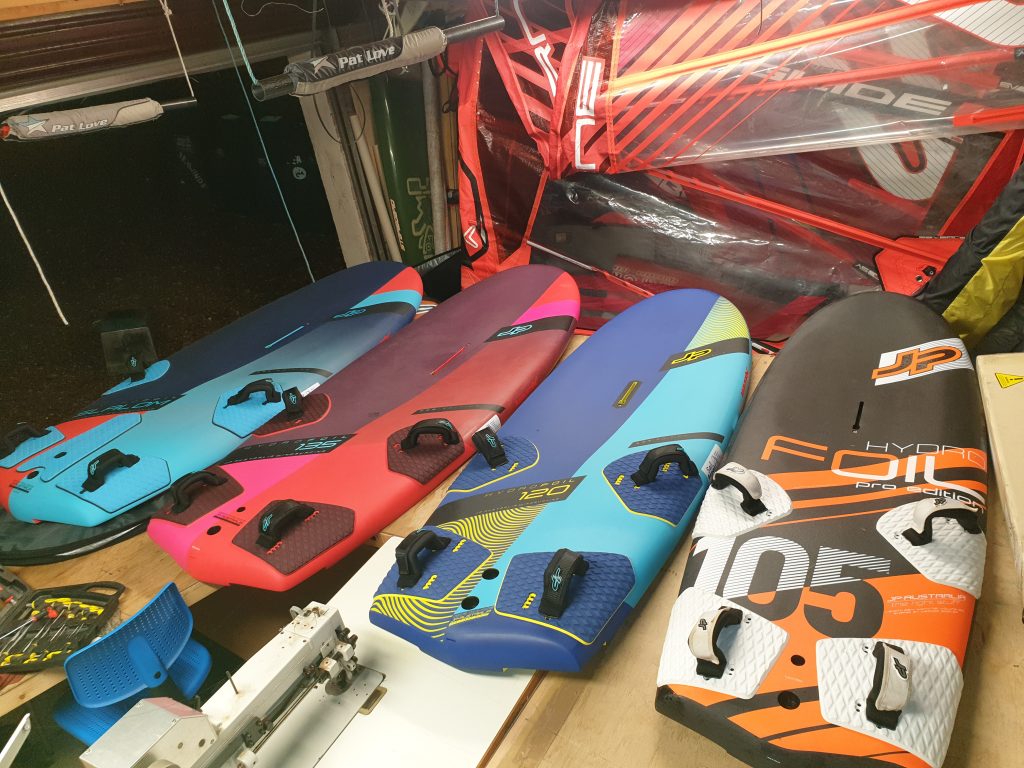
This is a comparative review of the  2019/20 105, 2021 120 and the  2020 135

105 Pro –  I love this board, I tend to sail it like a wave board with my back foot out of the straps and central. The board feel small and nimble and with its light weight it is a joy to gybe or ride small swells.  For me at 95kg I did need a slight breeze to keep the 105 going, in becalmed conditions it can become a balancing act due to the lack of volume in the nose but all it takes is a 5 mph breeze and a bit of forward movement and the board can chug around and you tend to forget it isn’t a big board. The board is uphaulable as long as there is at least 5 kts of wind (to balance with) and the sail is smaller than 6.0. Due to its lightweight (aprox 6.5 kg) it is quick to fly and once flying will keep going through lulls. I tend to use this board if the wind is 15+ kts. While I can uphaul it I prefer to waterstart it.  I have used the board in a good 30 kts and it keeps its manners well. On touchdowns it will normally bounce back up but in heavy chop and due to the 204cm length it can burry its nose. But there is something reasuring when you see the front of the board about 2’ underwater as you know the nose won’t be hit by the mast. I think once you get to boards around the 2m length that the mast hits the water before the nose so I have never damaged its nose (touch wood) despite crashing around in high winds.  Sail sizes – up to 6.5

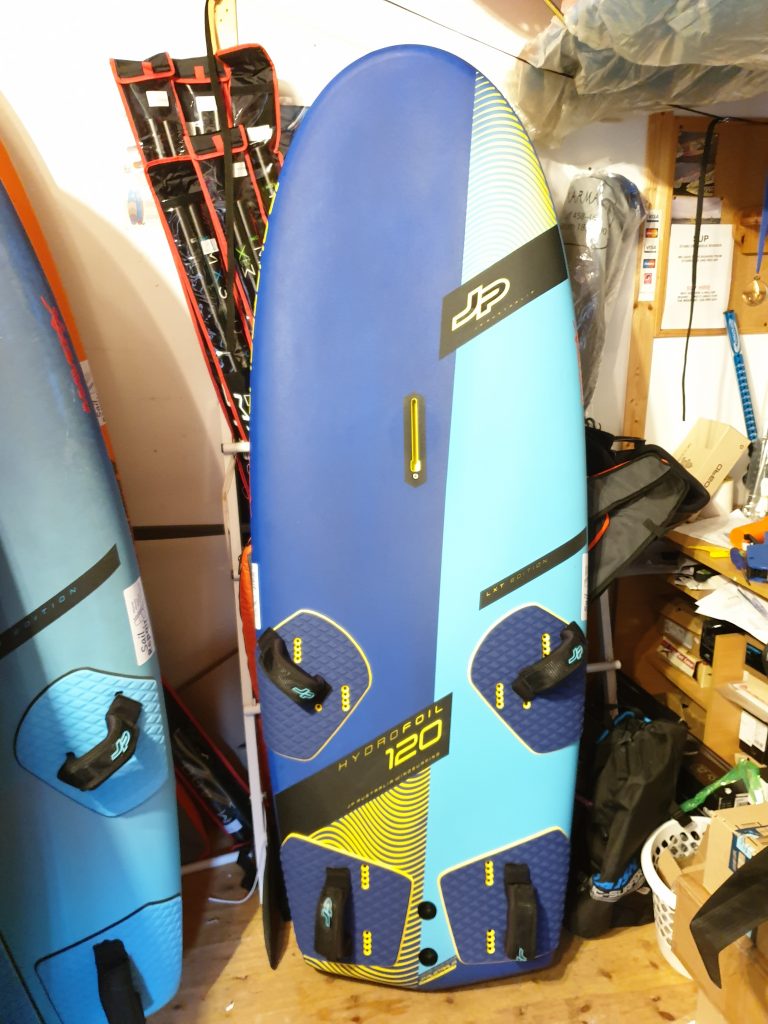
120 LXT – A great size of board, big enough to take a 7.0 and be usable in light winds but small enough to be nimble and agile and like the 105 it gybes very well with height corrections mid gybe easy and responsive. You can sail it in a sporty outboard strap fashion or in a more upright relaxed manner. It is still quite short so not the easiest to tack. Sail sizes 4.5 – 7.0
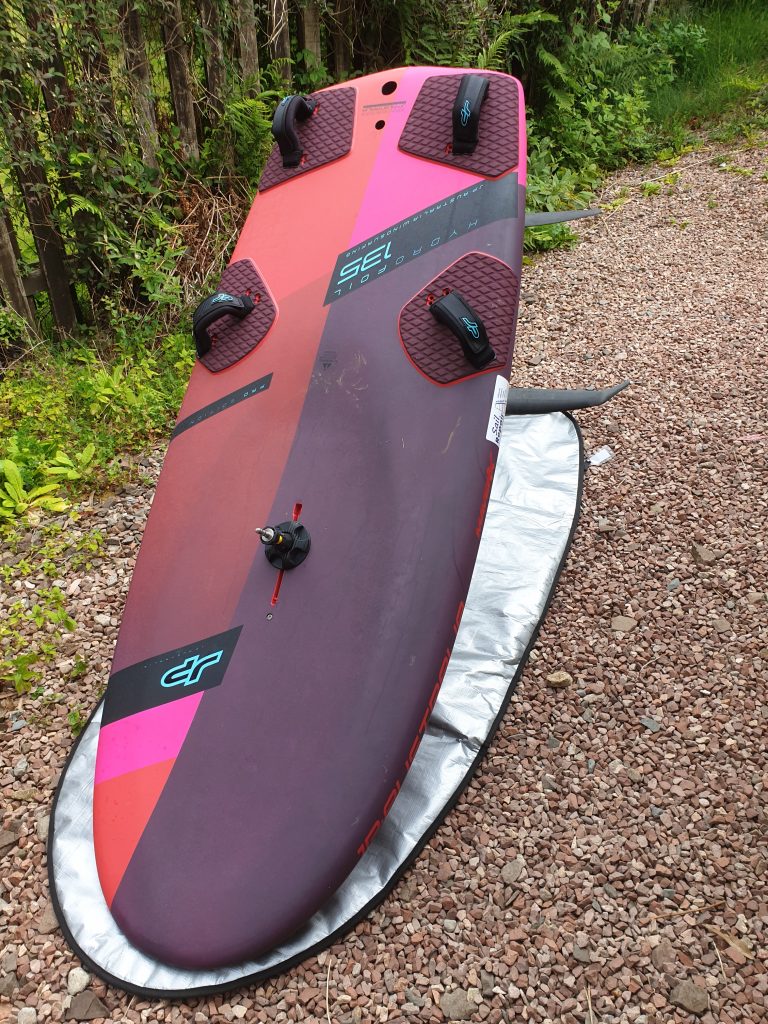
135 Pro – A very nice early flying board that is happy to take big sails. It gybes well and responds to height corrections providing a high success rate for flying out of gybes. It will take a 8.5 (when in the outboard straps) but the board’s sweet spot tends to be a 7.5. Sail sizes 5.5 – 8.5. 
General – The Hydrofoil range has a number of common traits. These top end construction boards are light and well finished. JP tends to have the front straps a bit further back than other brands such as AHD, Severne etc this makes the boards feel more eager to fly. This can be a positive or negative thing depending on your preference. It also makes them a bit more sensitive to what foil you use. At first having used the AHD Thunderbolt I found the JP 135 felt quite lively and less longitudinally stable but over time I got used to it and appreciated the lively ride. 

With the boards getting lighter as they get smaller the take off conditions are not as straightforward as they may seem. For example I can get the 105 flying with a 5.8 in the same wind speed as I could with the 135 and a 7.0. I would use the 105 with a 5.8 in the same wind as the 135 with a 6.5. The wider the board the further away from the rig you stand which allows you to hold down more power. The 120 sits in between the other two boards as you would expect. 

So who are the boards for? The 105 would suit a competent foiler for stronger wind foiling but it is also an easy board to float around on so it could be someone under 80kg 1st foil board. The 120 would suit most people and for sails up to 7.0. The 135 could be a first foil board for just about anyone but also for someone wanting to go faster. All the boards can be sailed in an upright relaxed fashion or pushed a bit more from the outboard straps. All the boards are comfortable slogging about off the foil. 
Posted on Leave a comment

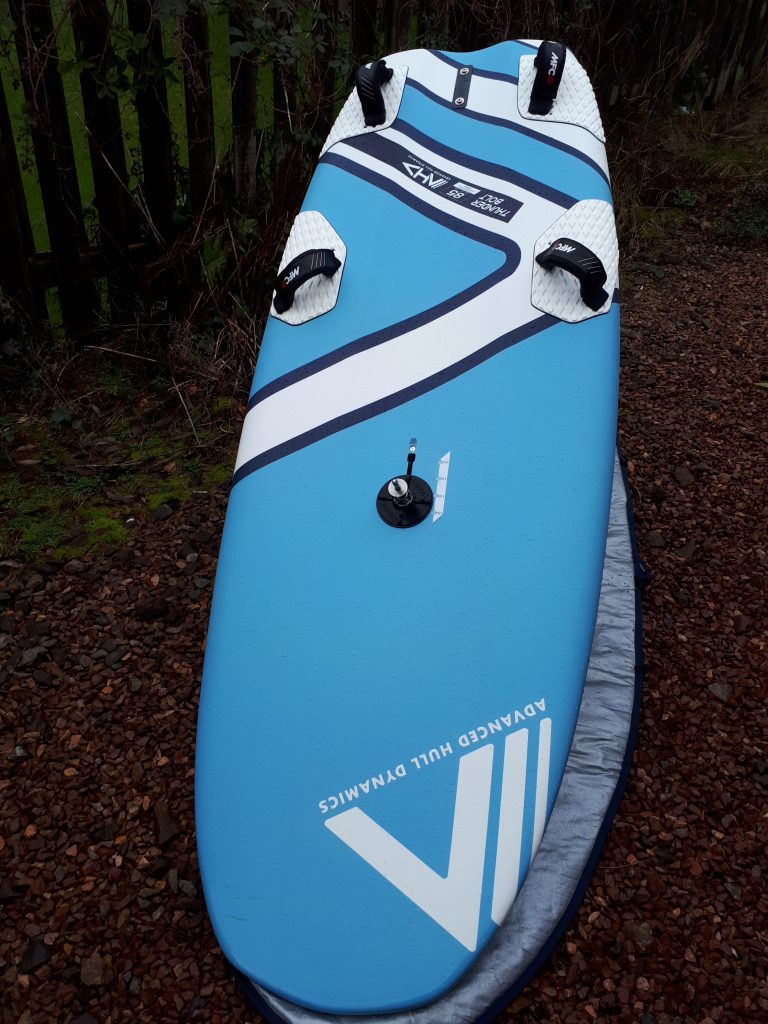
AHD Thunderbolt 85

AHD Thunderbolt 85

First impressions – The AHD thunderbolt range has been in production for a couple of years now and remains unchanged for 2021. AHD have a long history with foiling having been making foils and foil specific boards since as far back as 2009.

The boards have simple blue graphics and feature an unusual deep concave towards the rear of the deck. While it looks a bit strange you soon get used to it and the deck offers a large amount of “working space”. The front straps can be placed further forward than on some other brands of foil boards. 

The outline of the board has quite parallel rails and a squarish nose. The moderate length of 226cm gives easy glide to get flying or for when slogging about waiting to fly.  Underneath the board are some simple cutouts and a bevel to the front half of the board.

The construction is a full carbon sandwich which makes the price of £1369 very attractive however the boards are a little bit heavier than some other full carbon boards. 

On the water – The thunderbolt is very stable when stationary and easy and relaxing if you find yourself floating around waiting for a gust to get you flying. The deck is comfortable and the unusual deck contours around the foil box gives you good feedback as to where your back foot is without you having to look down. The board is 145 ltrs and it will support nearly all riders and allows easy tacking. 

Getting flying – The board offers a stable platform from which to pump the sail and get up to take off speed. I think the Thunderbolt will suit just about any deep tuttle wind foil be it a high aspect sporty foil or a high lift low aspect foil.

In flight –  This is the Thunderbolts “strong point”, with the straps a bit further apart compared with some other boards and the front straps again further forward the Thunderbolt provides an incredibly stable platform and flies level with ease taking gusts and wind variations in its stride. Inevitable touch downs are shrugged off without issue. 

Sail range? The board will take a 8.5 but you have to be in the outboard straps to be comfortable with a sail that big on long reaches. 8.0 or 7.5 are noticeably more comfortable. The board will keep its composure with sails as small as 5.0. In fact it’s top end like quite a few other foil boards is dictated by whether you can carry the board to the water’s edge. While it might sound easy, these are big boards and if you let a strong wind hit it at the wrong angle it will see you banging your foil off the ground before you know it. 

Gybeing – With plenty of deck space you have plenty of “balance room” while changing feet. Should the worst happen and you over foil mid gybe and everything comes crashing down there is enough deck space to make the experience survivable. It is a big board so the gybes tendy to be steady as opposed to nimble. 

Overall –  A very easy board to get on with and with performance to satisfy freerace fans while having the manners to encourage people new to foiling.

Posted on 8 Comments

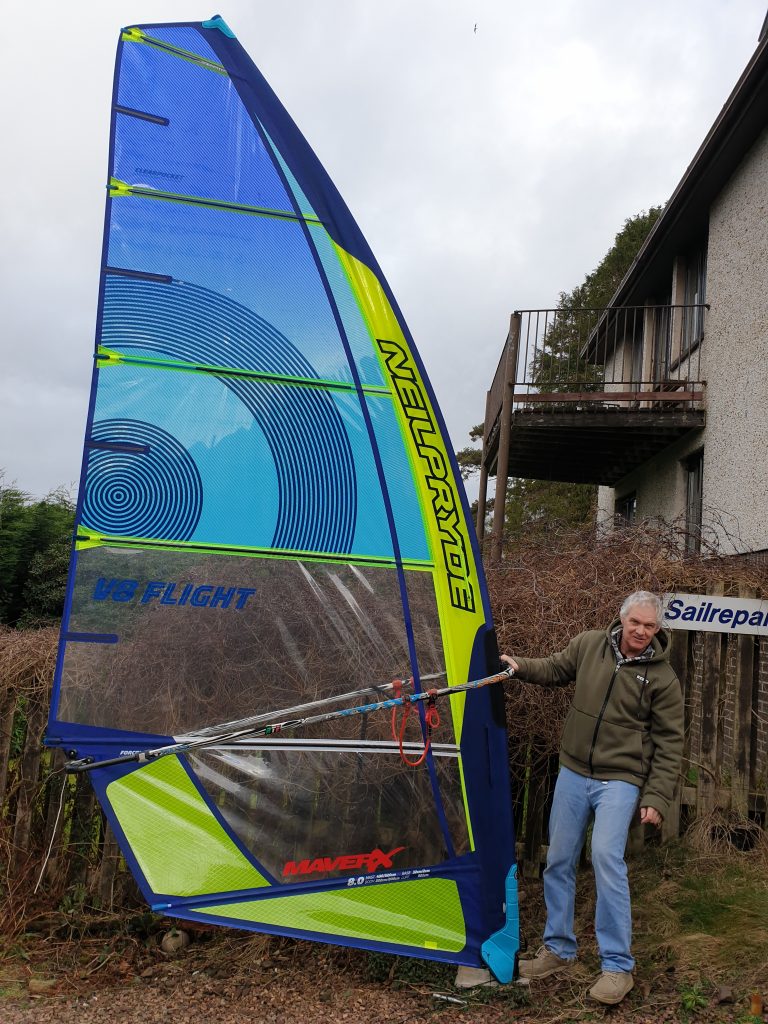
Neil Pryde V8 Flight review

Neil Pryde V8 flight sails

First Impressions

These are stunning looking sails and they are also light in weight. They rig with a lot of downhaul tension and the sails have a lot of skin tension. I need to say at this point that I used the sails on Maverx Elemento SDM masts. I have rigged many Neil Pryde sails over the years on these masts and the sails have always rigged well and worked well. 

There are rigging indicators on one of the upper panels and it advises you to down haul the sail until the looseness on the leech lies somewhere in between the two stickers. This area of the sail is dark blue and it is not that easy to judge whether you have enough downhaul or not. The leech does go soft but there is not a lot of twist in the leech and the head batten remains firm. I used the sails with varying downhaul settings and I used both the inboard and outboard clew eyelets. I probably used the inboard setting the most. 

On the water

I think the 8.0m may have got me flying in the lowest wind speeds I have ever taken off in. I am 95 kg and used the sails on a JP Hydrofoil Slalom with a AFS W105 foil with R1000 wings. I think (it is obviously a bit subjective) that I could get flying in around 6 kts of wind on flat water and once flying I could keep flying down to about 5 kts or even fractionaly less with a bit of help with pumping the sail at times.  Once up and flying the sails feel efficient and slippy through the air. The sails are not super deep and they do not pull like a tractor they therefore suit efficient high aspect foils best.  As the wind increases to the point where you want to exhaust some power the sails will do it but not in a relaxed fashion. I am not sure if this is due to the higher aspect ratio or the leech twist profile but probably a combination of the two. 

Gybing – the sails rotate easily enough with the battens going round in an undramatic fashion. The cams did stick a bit giving a slight S shape to the mast sleeve and requiring a second pump of the sail to correct. I won’t be over critical of this as maybe the NP mast is a mm narrower and that would be all it would take to maybe fix the problem. Of note is the fact that many other sail brands use cam systems where you can fine tune the cam pressure by using a series of cam spacers but with NP this is not an option.

Comparative sail size? NP claim the sail can be used about a meter smaller than their other sails. But is this a general term or aimed towards foiling as you could say that for any sail used on a foil rather than a fin. While the 8m did get me flying very early so yes maybe they will fly you at the same time as another cammed sails 0.5m bigger. In other words the 8.0 = a 8.5 from another range but I would not say the 7.0 = a 7.5 from other brands/ranges. 

Conclusion

I would sum up the V8 Flights as being very efficient within their wind range. While you can hang onto the sails in a strong blow they do become increasingly uncomfortable once outside their wind range. They would be a great sail on Maui or the Caribbean where the wind can be super consistent but I feel they don’t best suit a squally Scottish winter. 

Posted on Leave a comment

AFS 2021 Windfoils

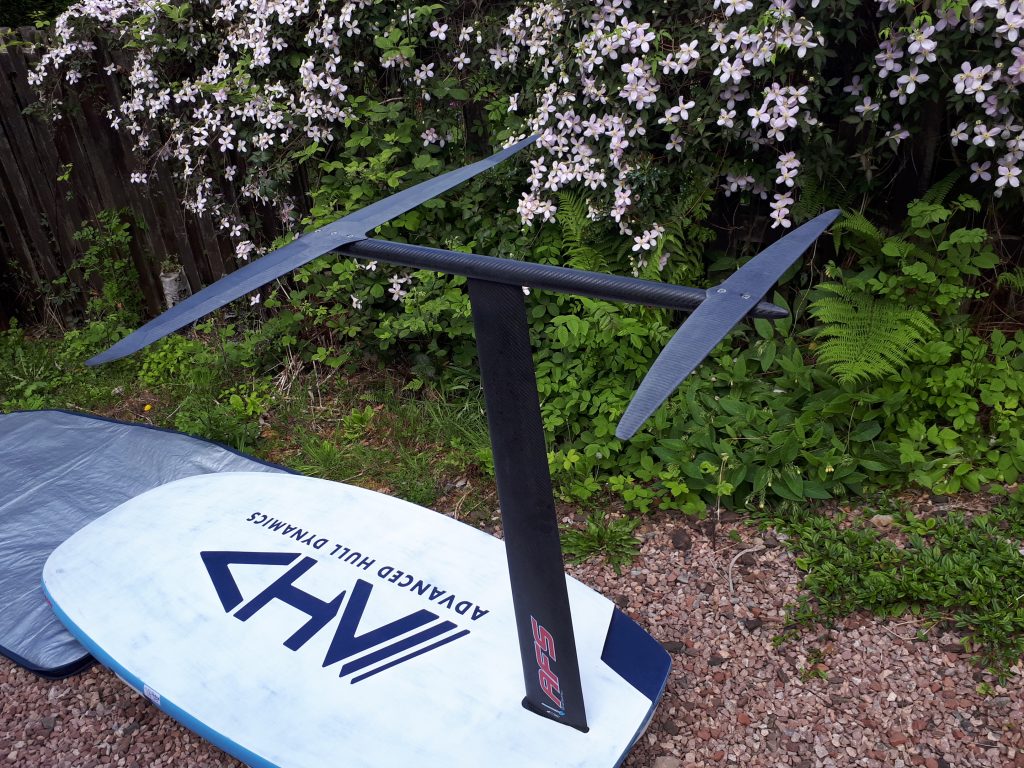
AFS Wind Foils

I have been using AFS wind foils for some years now so I thought I would give you my impressions of the latest 2021 versions. 

I used to use a W105 foil with the R1000 wings and that has been replaced like for like. The R1000 wing has been renamed R810 as the wings are now named by their surface area rather than their wingspan. The new wings will fit on older fuselages but the 2020 wings will not not on the wider 2021 fuselages (apart from on the w85 which is unchanged). The new flange at the top of the mast is now built in and much stronger. The graphics are built in which again is an improvement.

So would I notice any difference with the new foils claiming to be stiffer? Yes, there is a difference but you won’t start flying and say “wow this feels a lot stiffer” what I found is that with the older foils there must have been some increased flex that gave you a sense of height ie you were aware when flying at near full height but at first on the new foils I often found myself flying at full mast height without realising it. The flight feels the same whether you are 10cm or 100 cm above the water. The new fuselages are a few cm longer and if you thought the old foils gave a very level flight the new ones do even more so. 

I don’t race so I can’t comment on comparative upwind ability etc but will say I can point as high as I wish. 

I had the old W95 which was used mainly in stronger winds on narrower boards with a f800 wing. This has been replaced by the new W95 with either the R810 or R660 wings. The F800 (now renamed the F1080) is not available  for the W95 or W105 so I was at a bit of a loss with what to replace it with. I was slightly nervous that the R610 would be tiny and would be a very on/off type foil making life hard work in the gusty winds I often go out in but it is working well. I use the R810 with sails down to 5.3 and winds up to maybe a 25 kt gust. And then the R610 for the 5.3 and below and if the wind is over 20 kts. Even with its small surface area the R610 keeps going through lulls and round gybes etc (i am 95kg). 

The new foils come with shims. They have a shim for the front wing in case you find your board flies very nose up or down and then a second shim for the rear wing for you to increase or decrease lift. I am pleased to say I have not used the shims and the foils retain that “plug and play” nature of the older AFS foils, no need to go messing about with settings. 

I have used the R810 race wings for a couple of years now, despite their name they are very easy to use. They feel slippy and efficient through the water. To get flying they accelerate easily and don’t need much in the way of pumping downwards. You are best to concentrate on building speed through pumping the sail. When it is windy there is no need to pump at all and you can use the nearest bit of chop as a take off ramp. When the wind drops very light you can keep flying by pumping the sail, small high frequency pumps working the best. The only down side I can think of for using the race wings for learning is that they are very fine tipped so you don’t want to run it aground or kick it. The wings are very tough but with such a good product it deserves to be looked after.

I should point out that while the wings have a “race” label you don’t have to sail them from a outboard stance, the wings are very well mannered and can be sailed in a relaxed upright style with your back foot on top of the front foil bolt, in fact that is how I use them most of the time.

So in conclusion I am very happy with the new foils. I thought I would have to move my footstrap positions to maintain balance but the new foils have worked fine with the straps in the same positions I used for the earlier AFS foils.

R660, R810 and F800 wings
Posted on 15 Comments

Making a sail

A few people have suggested I should create a website on “how to make a sail”. This has as far as I know never been done before so why not? There are books and web sites devoted to making boards but not sails. Windsurfing sail makers like to keep their ideas to themselves. Sail makers are often afraid of adverse comment which could come from their peers if they were to go public with their design ethos and if I was responsible for making a large number of sails I would probably keep it all to myself as well.There are two elements to making a sail, its design and physically constructing a sail. Sail design could be a book in itself so I am not going to go into any depth on sail design but rather give general guidance which will be high lighted in red. Here we are making a one off “prototype” sail, at this scale there is comparatively little emphasis placed on efficiencies of production or brand image (graphics).OK, you want to make a sail, save a bit of money and your mum has a sewing machine. The trouble with sails is they are big flat things and you need a fair bit of space to make one. You will need a area large enough to lay a sail out and be able to walk around it which means about 6 meters by 3 meters. As regards sewing the sail you either need to take it to someone who can sew it for you or you are going to have to get a industrial sewing machine. Industrial sewing machines are quite big things (very heavy). The machine needs to be able to do a zig zag stitch and handle V69 thread. There is no point having a working area on the floor and your sewing machine up at table height. You need to construct a table level with the machine that is big enough to support the sail (think double table tennis table size). 4 sheets of ply and a few length of CLS timber should do it.
Getting started.I am going to assume you have a sewing machine and a large table level with the machine. Your table is you “blank canvas” for your sail design.Firstly you want to draw the outline of the sail you want to make. At this point you need to decide what size the sail is going to be and its boom and mast dimensions. High aspect (short boom tall mast) of low aspect (longer boom, shorter mast). Generally longer booms will get you planning earlier whilst shorter boom are more manoeuvrable. Have a look at the dimensions of similar sails, don’t fool yourself that you can fit a 9 meter sail on a 2 meter boom. You want to have a mental picture of what you want the sail to be like. I normally picture a particular days sailing that I want to use the sail for. It helps if you develop some reference points to guide you. Draw pencil lines around your existing sails using the tack and the luff sleeve up to the boom opening as a common reference points. This way you are using your existing sails as the prototypes to the sail you are going to make.At this stage you are going to have to draw the curve at the front of the sail (luff curve) and this is the most important part of the whole sail. Get it about right and whatever else you do the sail will be OK, get it wrong and even if the rest of the sail is perfect you will have a dog of a sail. It is how the curve at the front of the sail relates to your mast when it is bent with downhill / out haul that will determine the whole nature of the sail. In the diagram below we have 2 masts mast A with a even bend curve and mast B with a flexy tip. THE LUFF CURVE ON THE SAIL DOES NOT MATCH THE CURVE OF THE MAST. If anything the luff curve is almost a upside down curve the mast takes. The curve in the top third of the sail should be very slight and yet down near the boom the luff curve may be greater than the bend in the mast and that’s what produces the rotation or battens sitting to the side of the mast. The greater the difference at the head of the sail between the bend of the mast and the sails straighter luff curve the greater the pre twist will be in the leech (the more floppy the head will be). Sail designers tend to sit in specific camps on what the perfect luff curve should be like, in one camp you have Ezzy and North wave sails with very little rotation and then there is Neil Pryde ,Tushingham, Naish etc. with their well rotated sails. How much should the luff curve away from the straight head to tack line? 25 cm may be a reasonable staring point on a 430 luff, more for bigger sails , less for smaller. If you compare the curve with your existing sails they will mislead you, any shape in the body of the sail will put more apparent luff curve into the sail when you lie it flat. For a example of altering a luff curve to suit a different mast click here .
With reference to the clew hights of your existing sails you should be able to establish your perfect clew height. Once you have drawn a rough outline of the sail the next thing is to draw on the battens. More battens = more stability and better top end, less battens = lighter weight and improved manoeuvrability. Decide whether the lines you are drawing on if the middle, top or bottom of the batten pocket, I always draw the bottom of the pocket.So now we have a sail outline with battens, the final part of out 2 dimensional design is to draw the panels on. There are a number of reasons for the seams on a sail, they allow a change to a more appropriate type of cloth for that region of the sail i.e.. Heavier materials in the foot of the sail. Seams also allow us to put shaping into the body of the forming a 3 dimensional foil. We will come to how to do seam shaping later. Nearly all modern sails have hidden seams under every batten pocket. This allows for accurate seam shaping but also helps with cloth efficiency. Big panels waste big bits of material between then when they are cut from a roll of cloth, the smaller the panels the less waste. This isn’t really much of a issue when making your own sail and I would advise you to keep the number of seams to a minimum. Seams also allow for colour changes and “brand identity” again not a concern at this point.Below is a picture of my design table, you can see the clew positions of my 4 wave sails and you can see how the sails are scaled, I like about a 10 cm difference in my boom length when changing sails.Over to the left you can see the lines for the foot panel seems.
OK we should now have a full scale line drawing of the sail we want to make. We have the outline, the battens and some seems. Its all very good so far but its very 2 dimensional. How do we make it 3 dimensional? – luff curve and seem shaping.Most of today’s sails are fairly flat especially in the top half of the sail. But why do some battens rig completely flat while others, especially the foot batten have quite a bit of fulness in it. The answer is that the foot batten and most likely the batten above the boom have seams running under the batten pockets. These seams have shaping in them. When you join two pieces of cloth if the edge of both panels are straight the seam will be just a flat joint of the materials. To put shape into the seam we attach a curved edge to a straight edges. Bellow is a sketch of what happens and you can try this by sticking a couple of sheets of paper together. Once you have stuck the curved edge to the straight one the cloth will never lie flat.For ease of shapeing aim to put a seam under at least the foot batten and the batten above the boom.Design note: making a good sail relies on using the correct blend of a number to criteria. For example very full sails and lots of batten rotation do not tend to work well together.
OK. We have a line drawing of our sail with lines drawn on for the battens and seams. We are now ready to start cutting some cloth. You want to start with a central panel, lets say a main window panel. Roll the cloth out over the drawing of the panel and then draw the edges of the panel. Don’t cut anything out yet. The lines are one edge of you seams. When you cut out the panel next to it the edges will but up together. On one of the edges you will need to add the double sided adhesive tape to the out side of the panel. (Nearly everything on the sail is stuck before it is sewn) Below you can see the dashed seam line drawn on the table with the adjoining panels pulled back slightly so that you can see it. I have added the double sided tape to the top xply panel. You can then use the edge of the double sided tape as a cutting guide. You can now cut the panel out next to it.
When you come to a seam the you want to have some shape in it draw the straight lines as before but now you are going to add a second curved (convex) line. The maximum draft (fullness) of the seam will be where the curved line is furthest from your straight (base) line. So you actually want the maximum curvature on the line to be 25 to 35 % back from the luff just like the curve you would expect from a batten. How much shape? A foot batten seam for example might have 10 mm over a 1.5 meter length.Below is a foot batten seam before its stuck together. Note that it is one foot panel going onto three or four other panels. In cases like this it is better to leave the panels a bit over size and then trim them all in one go one the are glued together. Before you stitch any seam on monofilm or xply you must stitch insignia tape to both sides of the seam to reinforce the materials.
Carry on with the other panels. Leave the external edges of the sail with a bit of surplus cloth as its easiest to trim the sail once it has all it panels together and sewn.Below are the panels to a 5.5 wave sail. The sail is not very conventional as it doesn’t have the horizontal shaping seam under the batten above the boom (it has shape on the vertical luff seam instead). It also has overlapping panels at the clew.
Stick and sew two panels at a time until the sail is all in one piece. You can now trim it to your design on the table and draw on the batten pockets.As below we now have something resembling a sail.
Where you have horizontal seams and you are going to reinforce them with insignia tape you may as well kill two birds with one stone by using 50 mm wide insignia tape which you will use under each batten pocket the crosses monofilm or Xply as per the picture below.
You can now start adding the 2 ply. Note every where that you sew xply or monofilm it must be reinforce with insignia tape or have a layer of cloth glued on each side (as per the edges of the corner patches. You can see below I have used black insignia tape, I have also added white insignia patches to take two small battens on the upper leech.
Below you can see the different layers of xply building up to a well reinforced clew. The bit of monofilm under the sail with all the stitching on it is just a scrap bit of material used to set up the thread tensions on the machine and has nothing to do with the sail.
Below the outer patches are being added. You want the patches to be a composite of layers of something like heavy monofilm to resist stretching and layers of a woven material (sailcloth) to give rip strength.
Next we put the 50 mm wide insignia tape where the batten pockets go and also the batten pocket material on the back of the sail to prevent scuffing (optional). Once you have that on you can fold some sailcloth tape and sew it down the leach and along the foot. This is the only part of my sails that isn’t glued on prior to sewing.
Next is the webbing along the foot. Then the batten pockets. I add a additional layer of monofilm in the batten pockets due to the high stretching force applied with the batten tensioners. How you finish the pockets off depends on the tensioners you are using. Once the batten pockets are on you can tape the luff. On some sails this is done before the batten pockets go on. Then you need to make fronts for the batten pockets which are normally a couple of layers of sailcloth and monofilm.
That really just leaves the sleeve. Take measurements on the width required from a existing sail and adjust as you see fit. Mast sleeves can be made from one or a number of pieces. The head of the sleeve will need reinforcing to take the down haul strain onto the mast tip. I would advise you make a adjustable head on you first few sails. Measure the sleeve and stick and sew it on only down to the foot batten. Then you can make a pad for the sleeve and finish it off. For eyes you can take the sail to a sail maker for them to press the eyes or you can steel some take pulleys of some old sails.Below is the first rigging of the sail. Remember there are no printed dimensions on the sail so you must know what shape you are looking for and rig it till it looks right. The things to look for are draft (fullness) flat at the top fuller below the boom. If you are wanting batten rotation you want to see the sleeve progressively twist. Pre twist – a personal thing, but is it as you wanted it?
Below shows a good view of the batten rotation, pre twist and sail draft.
Another view of the pre twist.
And now for the completed sail.
OK we have made a sail but there are some things you need to think about before you rush to get your sewing machine out.How much does it all cost? You can get a second hand sewing machine in the UK for about £350 upwards. The material cost drops greatly after the first sail or two. Budget on nearly £200 for you first sail and the £150 there after.Where do I get the battens from? You can buy new battens for £10 to £20 each, you are better off buying a written off sail for £30 and you can use all the battens and tensioners.What material do I need? You can use Monofilm (cheapest option) but I would advise a more robust material for the foot and luff. You will need monofilm for the reinforcement and maybe some xply for the foot etc. (you can use all xply if you wish). There are some good materials out there such as the Pentex tafita scrim laminate (the white cloth in the pictures) but they cost four time the cost of xply. You also need the double sided tape, insignia tape, 50 mm sailcloth tape (for batten pockets and edging). Sleeve cloth and some webbing.Just how accurate does everything have to be? You should notice about 2 mm difference in seam shaping , 5 mm in the luff curve. I use long fibreglass battens for drawing lines. You can use the edge of a roll of monofilm as a straight edge.Do I need to heat seal any thing? Yes the sleeve cloth and standard polyester sail cloth will need heat sealing, you can use a soldering iron for this.How does this method of making a sail differ to how the large international lofts make sail? The sails will be cut via computerised template the cloth will be cut maybe up to 20 layers thick at a time. The bits are stuck together and machined together. Economies of scale are quite great and the cost for them making a sail is a fraction the amount it will cost you.
Phew. Finished, when I thought of doing this web page I didn’t realise how much I would have to say just to explain the basic process. Apologies to anyone with a dial up connection.JohnLatest project – Soft Wave sailsI am currently working one some soft waves sails. By combining the highly manoeuvrable handling that comes with soft sails in conjunction with a modern twist profile and high tech materials the aim is to take wave sails a step forward.
Viewed from the head showing the draft.
The whole sail which also features a prototype draft lock system.
The above article is quite a few years old but here is a sail made during covid lockdown.
7.0 foil sail

Posted on Leave a comment

Which Witchcraft board?

With a range of 5 wave boards people in the UK can find it hard to decide which would be best for them so here is my take on what board does what best.

Wave 5.0 – A refined wave board for powerful waves. This is the board for when most of your power and speed are coming from the wave rather than your sail. As an indication of what these boards are best at you just need to look at where they are developed. In the winter in Fuerteventura  you can often have 15 to 20 kts of wind and mast high waves. These are the boards for places where you can choose cross shore conditions “big smooth race track faces” 

Recommended for Cornwall, Tiree and the West coast of Ireland.

Haka – Again a full on wave board but this is for when both the waves and wind are “big”. The Haka is for when you have chop on the wave face, maybe overpowered out the back. It is the logo high and 30 kts cross shore board.

Recommended for Cornwall, Tiree and the West coast of Ireland and those occasional South coast epic days. 

Shaman – Again let’s look at the spots where it was designed for – places like Pozo and El Medano. In other words sunny versions of England’s south coast. Not quite as tight turning as the above boards but a bit quicker to help you clear the inside mush and the Shaman will carry speed when riding frontside in cross on conditions ie when you aren’t getting much help from your sail. 

Recommended for South coast, and most of the UK shoreline. 

Reaper –  The “new kid on the block”, so what’s it for? Whereas the above boards work best being driven with front foot pressure, with the shorter reaper you can sail it like that or use your back foot more, it allows a more aggressive riding style. With the footstraps slightly further back than on the other boards there are a lot of tuning possibilities allowing you to set the board up suitable as a fast wave board ideal as your largest board but also as an aggressive high wind board for tearing around the break. The harder you push the board the more you will get out of it. 

Recommended for all coastal conditions. 

Chakra – While the Chakra gets the Freewave tag in the Witchcraft line up, don’t think it is not capable in sizeable waves. It is quick and easy to sail, ideal for gusty conditions as the board keeps going through the lulls very well. The flatter the water the bigger the center fin you want to maximise drive and speed in bump and jump conditions. 

Recommended for all coastal conditions plus flatter water. A good board if your local spot is flat but you like to have a few days away to some wave beaches.

With five ranges there is obviously a large overlap in what the boards can do and using the above guidance you won’t go far wrong. Unlike many other brands Witchcraft offer the  boards in more sizes which helps you choose the right size. If you find yourself unsure between two sizes always choose the larger one. 

Posted on Leave a comment

2021 Severne Alien 115

First impressions – A nice looking board, although that is always personal taste. A very limited paint finish should be easy to match in any repairs that might be required along the line. The board is quite light. The footstraps attach to the board with allen screws using the same tool you use for tightening the severne sail battens. 

There are a good range of positions for the straps making the board easy to balance with most foils. The forward/rear adjustment of the footstrap holes is a whole 10cm, most boards have 4cm! The mast track is the conventional distance from the foil.

On the water – when I first tried the board the wind was cross off and there was zero wind at the slipway. The board felt quite a bit smaller than 115 ltrs. The board is stable as long as it has the slightest of forward motion.  At 200 x 70 cm it is rated up to about a 7.0 sail which is about right, best with 6.5 and down. 

Getting flying – a combination of the boards “corky” or buoyant nature along with its light weight and many footstrap options make the board fly easily and early. 

In flight – it is comfortable and easy to control. With the 70cm width the board feels more foil freeride than foil freerace. The majority of touches go unnoticed but at only 200cm you do have to watch the nose if you plant it into the face of a bit of chop. If you can hang on the thickness in the nose will soon pop it back out again.

Gybeing – despite not being a big board you can positions the footstraps to give yourself a decent amount of deck space for gybing and the lightweight helps the board keep its height around the turns. 

Overall –  A nice board, easy to use without any vices. If you are over 85kg you might be better off with the bigger 125 ltr version. It will suit a wide range of foils and undoubtably will balance nicely with severnes own redwing foil.

Posted on Leave a comment

Goya Airbolt

2021 Goya Airbolt 120

First impressions – Nice looking board with a limited paint finish. I expected it to have the option for a single back strap but it just has options for double back straps both inboard or outboard. The board is quite a unique shape giving the bottom of the hull a very 3D shape with stepped ridges running most of the length of the board. 

Most dedicated foil boards have wide buoyant tails to help support the rider when he/she moves back to weight the foil and get flying. Instead of this usual arrangement goya have moved the foil position further forward. So when you look at the deck of the board it looks almost like a traditional pintail shape with the straps forward and the tail not overly wide. But when you look at it from the side you realise that the rear stap still lines up with the front of the foil mast. 

The mast track is quite far back so not far in front of the front straps and there looks to be plenty of open deck up front.

On the water -The 120 was easy to uphaul. With the rearward mast track you can put your front foot in front of the mast base and uphaul in a traditional manner despite the boards relatively short length. Oncy the sail is up the board feel buoyant and has a slightly corky feel dut to all the volume packed into a compact shape.

The board is rated to take up to a 8.0m sail and I have no doubt it can take it. I tried the board with a 7.5 and it was certainly doable but the board came more aline and pleasant with a 6.5 or smaller. The fact that the mast track is close to the front straps means you are standing close to the rig which I don’t feel is ideal with bigger sails.  

Getting flying – this is where things got interesting. I am used to more traditional or racey foil boards and I tend to pump up onto the foil to get flying that bit earlier. When I tried this on the Goya the board would rock from side to side disturbing the water flow. I think this is caused by the bottom not being flat so you don’t have a stable platform from which to pump both sail and board. I found it better to actually let the board accelerate in its own right and get flying that way. Someone new to foiling would most likely find this technique easier but for me I think the end result was that I required about 1kt more wind to get flying than on similar sized dedicated foil boards. There is not much room to get your rear foot between the straps so you are best getting into the back strap early. 

In flight – With a sail 6.0 or smaller the position is very comfortable in the straps, one of the most comfortable foil boards I have used. With the bigger sails that the board is rated to take I felt a bit close to the rig. Nothing wrong with that except when the wind picks up a bit you can’t distance yourself from the power so easily so you have to change down that bit earlier. Height control is easy. The board shrugs off the majority of touch downs. It is not the longest of boards at just 205 long so it is possible to catch the nose if it comes down into some chop. On flat water the board can look after itself. 

Gybeing – The board carves round nicely. I feel the double foil tracks + the deep tuttle box adds a bit of weight in the tail and in lighter winds I was aware of the weight dragging the board down a bit once you are without any rig power and just gliding round. But overall the board feels nimble and maneuverable.

Overall – Despite the unusual bottom shape and maybe extreme looks the board is actually fairly easy to use and will feel more familiar than the big wide tailed boards to anyone new to wind foiling. The board probably suits lower aspect foils and smaller sail best.